
Server Security
How to Change the SSH Port on Modern Linux: Ubuntu, Debian, AlmaLinux and Rocky
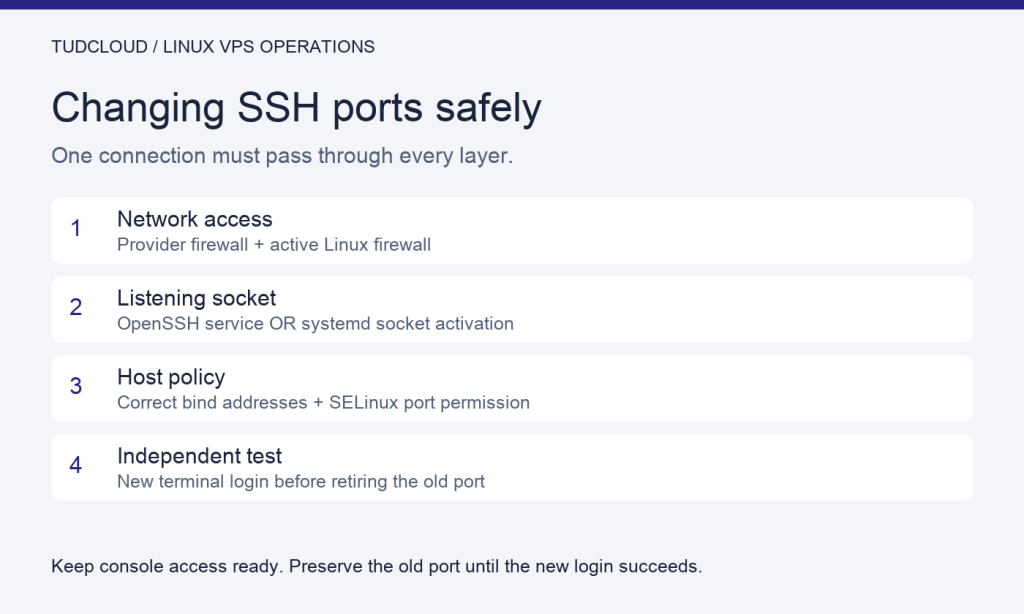
Changing the SSH port on a modern Linux VPS can involve more than editing /etc/ssh/sshd_config. A systemd socket may own the listener, included configuration files may add settings, SELinux may reject a new port, and a provider firewall may block it before traffic reaches Linux. This guide walks through those layers without closing your working access path first.
Scope: Linux VPS installations using OpenSSH and systemd, including Ubuntu, Debian, AlmaLinux and Rocky Linux. Follow the branch matching your actual listener and firewall. Examples migrate from TCP 22 to 22397; substitute your existing and desired ports throughout. A different port reduces some automated scan noise but does not replace SSH keys, updates or access restrictions.
1. Prepare a recovery path and record the current setup
Keep your existing SSH session open. Open and test your provider’s VNC, serial or rescue console before making changes, particularly for the socket branch below. Know how to sign in through that console. Do not simultaneously change the port, authentication method and permitted users.
cat /etc/os-release
sudo ss -ltnp
systemctl status ssh.socket sshd.socket ssh.service sshd.service --no-pager
sudo /usr/sbin/sshd -t
sudo /usr/sbin/sshd -T | grep -E '^(port|listenaddress|addressfamily) '
sudo grep -RnsE '^[[:space:]]*(Include|Port|ListenAddress|Match)[[:space:]]' /etc/ssh/sshd_config /etc/ssh/sshd_config.d
A missing unit or directory is normal on some distributions. Look for the active socket and service names, and check whether the desired new port is already occupied. sshd -T describes the daemon configuration; ss shows actual live listeners. Under socket activation those can differ. If the service uses a custom -f configuration or command-line -p option, inspect systemctl cat for that service and adapt the checks to the real configuration. OpenSSH documents configuration validation and command-line overrides in its sshd manual.
Create a root-only working backup and record its path:
sudo install -d -m 700 /root/ssh-port-backups
sudo cp -a /etc/ssh /root/ssh-port-backups/ssh-$(date +%Y%m%d-%H%M%S)
Also save any existing socket drop-in directory before editing it. Record the old listener, firewall zone and rules. The backup contains host private keys, so keep it private and off public web directories.
2. Allow the new port through every firewall first
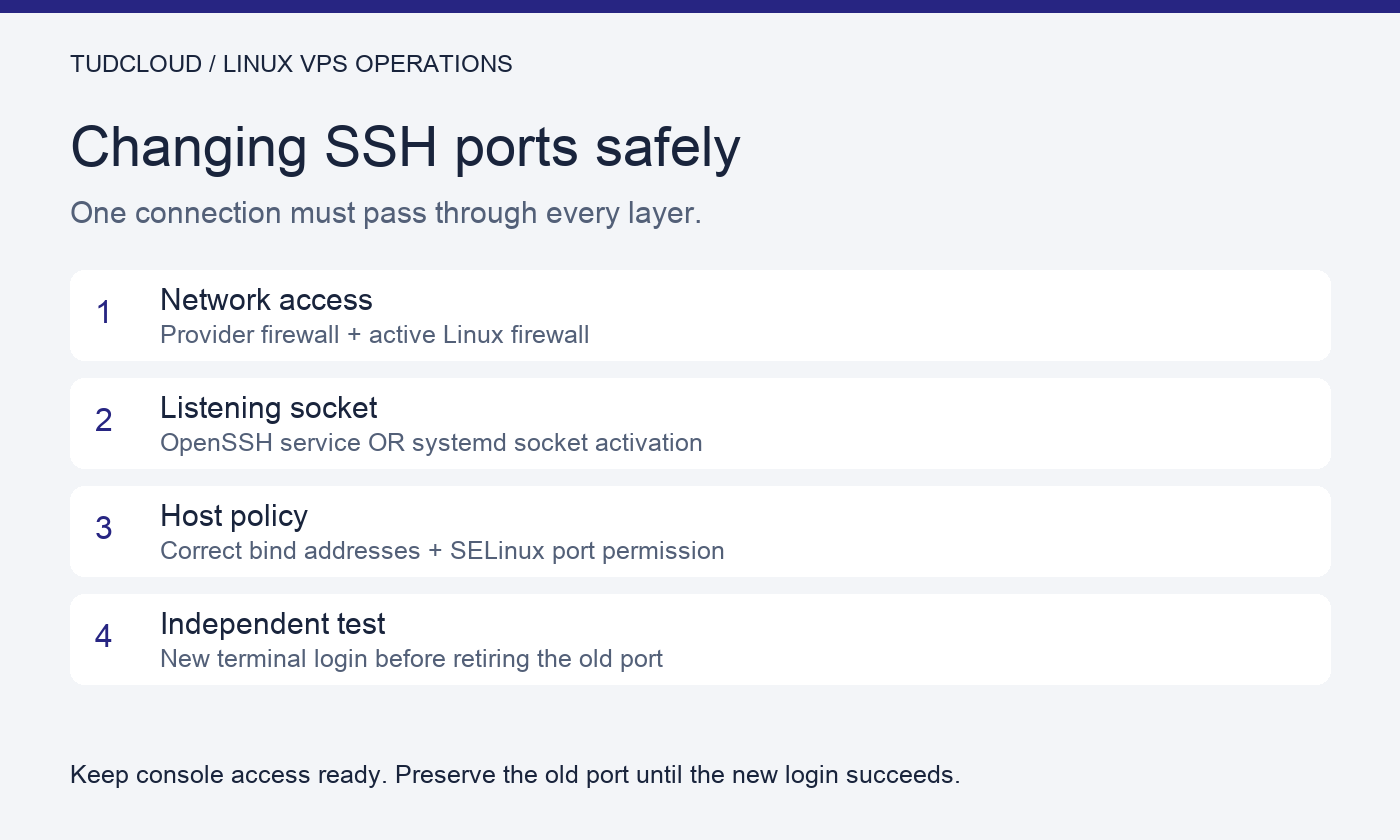
In your hosting panel or cloud security group, allow inbound TCP 22397 from your management addresses. Preserve the existing SSH rule. Check both IPv4 and IPv6 if you use them, plus NAT port forwarding where applicable. A Linux firewall rule cannot override an upstream block.
If UFW is your active firewall
sudo ufw status verbose
sudo ufw allow 22397/tcp
sudo ufw status numbered
See the Ubuntu firewall guide for UFW usage. This example permits any source; restrict it to your management IP or CIDR where practical. If UFW is inactive, do not enable it as part of this port change without first reviewing all required services. The predefined OpenSSH profile commonly covers port 22, so do not assume allowing that profile opens your custom port.
If firewalld is your active firewall
sudo firewall-cmd --get-active-zones
Identify the zone governing your management traffic. In the following example it is public; replace that name if your zone differs:
sudo firewall-cmd --zone=public --add-port=22397/tcp
sudo firewall-cmd --permanent --zone=public --add-port=22397/tcp
sudo firewall-cmd --zone=public --query-port=22397/tcp
sudo firewall-cmd --permanent --zone=public --query-port=22397/tcp
Both runtime and persistent rules matter. Adding both avoids a reload that could discard unrelated runtime-only rules. See firewalld’s port and service guide. If you use nftables directly or a managed firewall product, update that existing system instead of installing a second firewall.
3. On SELinux systems, permit SSH to bind the new port
AlmaLinux, Rocky Linux and RHEL installations commonly enforce SELinux. Check rather than disable it:
getenforce
sudo semanage port -l | grep ssh_port_t
If semanage is unavailable on these distributions, install its management package:
sudo dnf install policycoreutils-python-utils
If TCP 22397 is not already assigned to ssh_port_t, add the association:
sudo semanage port -a -t ssh_port_t -p tcp 22397
sudo semanage port -l | grep ssh_port_t
If the command reports that the port is already defined, inspect the existing assignment, including ranges. Choose another unused port when it belongs to another service; do not blindly relabel it with -m. The semanage-port manual explains port-label management.
A message such as Bind to port 22397 ... Permission denied can indicate a policy denial. Check the service journal and, where audit tools are installed, sudo ausearch -m AVC -ts recent. An address-in-use error points to a different problem. Disabling SELinux is not the required fix.
4. Configure OpenSSH to accept both ports temporarily
Edit the server configuration, not the client file /etc/ssh/ssh_config. Inspect the active Include directives first. If the standard /etc/ssh/sshd_config.d/*.conf directory is included in the global section, create or edit a dedicated file:
sudoedit /etc/ssh/sshd_config.d/90-port-migration.conf
Put these two lines in it:
Port 22
Port 22397
If that include is absent, edit the global section of /etc/ssh/sshd_config instead, before any Match block. Reconcile existing active Port declarations rather than assuming a filename beginning with 90 overrides them. Multiple Port directives are allowed. Explicit port numbers in ListenAddress also need attention; preserve intentional address restrictions. These behaviors are described in OpenSSH’s server configuration manual.
sudo /usr/sbin/sshd -t
sudo /usr/sbin/sshd -T | grep -E '^(port|listenaddress|addressfamily) '
Stop if validation reports an error. Confirm both intended ports and the correct bind addresses before applying changes.
5. Apply the change using the correct listener branch
Branch A: the SSH service owns the listener
If no SSH socket is active and sshd owns the listening socket, reload the active service. Use only the command matching your installed unit:
# Common Ubuntu / Debian service name:
sudo systemctl reload ssh.service

# Common AlmaLinux / Rocky / RHEL service name:
sudo systemctl reload sshd.service
Do not run both commands as a universal recipe. If your service does not support reload, use its supported restart procedure from the recovery console. Then inspect its status and actual listeners.
Branch B: systemd socket activation owns the listener
Ubuntu introduced default SSH socket activation in 22.10. Older upgraded installations can retain address overrides; Ubuntu 24.04 introduced a generator deriving listeners from SSH configuration. Therefore a daemon reload alone may leave the old socket active. The Ubuntu engineering announcement explains the distinction. Detect your running configuration rather than assuming every newer Ubuntu or Debian image behaves identically.
sudo systemctl cat ssh.socket
sudo systemctl daemon-reload
sudo systemctl cat ssh.socket
sudo systemctl show ssh.socket -p Listen
If the resulting socket configuration contains both intended ports and addresses, keep the generated setup. If an older deployment or local override still defines the wrong listeners, inspect its drop-ins first. For the common wildcard-listener case, a dedicated local drop-in can explicitly define the temporary pair:
sudo install -d /etc/systemd/system/ssh.socket.d
sudoedit /etc/systemd/system/ssh.socket.d/99-port-migration.conf
[Socket]
ListenStream=
ListenStream=22
ListenStream=22397
The empty assignment clears earlier socket listener entries. This example uses wildcard listeners: if the server was intentionally restricted to a particular IP, preserve those bindings instead. Inspect all drop-ins for later conflicting entries. Never edit the packaged unit under /usr/lib/systemd/system or generated files under /run. See systemd socket settings.
Run the activation sequence from your tested provider console. An already-running daemon may still hold inherited listening sockets. Stop the socket and service together, then start the socket and service again after validation; this creates a brief interruption and custom units may terminate sessions:
sudo /usr/sbin/sshd -t
sudo systemctl daemon-reload
sudo systemctl stop ssh.socket ssh.service
sudo systemctl start ssh.socket
sudo systemctl start ssh.service
sudo systemctl status ssh.socket ssh.service --no-pager
Run each line separately and inspect failures before continuing. These names apply to an ssh.socket/ssh.service deployment. If discovery showed a different pair, inspect those units and substitute their actual names. Do not enable a socket merely because this guide mentions one.
6. Prove that the new port works from another computer
sudo ss -ltnp 'sport = :22 or sport = :22397'
From a new terminal on your own computer, connect using your normal administrator account:
ssh -p 22397 your_admin@YOUR_SERVER_IP
Confirm a real login and required sudo access. If you use both address families, test each explicitly with ssh -4 and ssh -6. An IPv6 wildcard listener does not by itself prove external IPv4 reachability. Verify the host fingerprint if prompted: changing the port does not require changing the server’s host keys.
- Timeout: inspect provider filtering, routing, source restrictions and local firewall rules.
- Connection refused: check the destination address, live listener and possible firewall rejection.
- Authentication denied: you reached an SSH service; inspect the user, key and authentication policy.
- Configuration says 22397 but live socket says 22: inspect socket drop-ins, generated settings and inherited listeners.
For service errors, use the relevant journal, for example sudo journalctl -u ssh.socket -u ssh.service -n 80 --no-pager, or sudo journalctl -u sshd.service -n 80 --no-pager. Do not publish private keys or passwords when sharing diagnostic output.
7. Remove the old port only after successful testing
Remove the temporary Port 22 and reconcile any other active declaration or explicit bind that still enables it. If you created a socket override, remove its ListenStream=22 as well. Validate, apply the same appropriate branch and log in again on 22397. Confirm that port 22 is no longer listening.
Then remove the old SSH access rule from the provider firewall and your local firewall. With UFW, review numbered rules and delete only the old rule; an OpenSSH profile rule may also expose 22. With firewalld, review --list-all for the relevant zone: the ssh service may allow 22 even when no explicit port rule appears. Remove the relevant old allowance in both runtime and persistent configuration. Do not remove a rule that other services still require.
Update SSH client profiles, deployment jobs, SFTP clients, monitoring and backup tools. For scp the port option is uppercase -P. During a maintenance window, with console access available, reboot and repeat the external login check to verify persistence.
Rollback if the new port fails
- Keep the old provider and local firewall allowances while diagnosing. If already removed, restore them from the provider console.
- Restore the SSH configuration files you changed from the recorded backup. If the migration drop-in did not exist before, remove only that newly created file; copying the old directory over the new one will not remove added files.
- For socket activation, restore the previous local socket drop-ins or remove only your new migration override. Run daemon-reload and use the console activation sequence again. For a service-owned listener, validate and reload its service.
- Check that the previous listener is active and test a fresh login on the previous port before closing the console.
Do not regenerate host keys or reinstall the OS to repair a port change. If you added a SELinux mapping or firewall allowance, clean up that specific addition only after recovery and only if nothing else needs it.
Plan access before your next VPS deployment
For panel recovery access, see our Virtualizor VNC guide where your service uses that panel. Continue with the Ubuntu security checklist or AlmaLinux and Rocky Linux security guide. Comparing hosting options? Explore TudCloud Hong Kong VPS and Seattle VPS, and confirm the available recovery console for your selected plan.
Documentation reviewed October 15, 2026. Commands are a configuration-dependent operating guide, not a claim of testing on every distribution image.